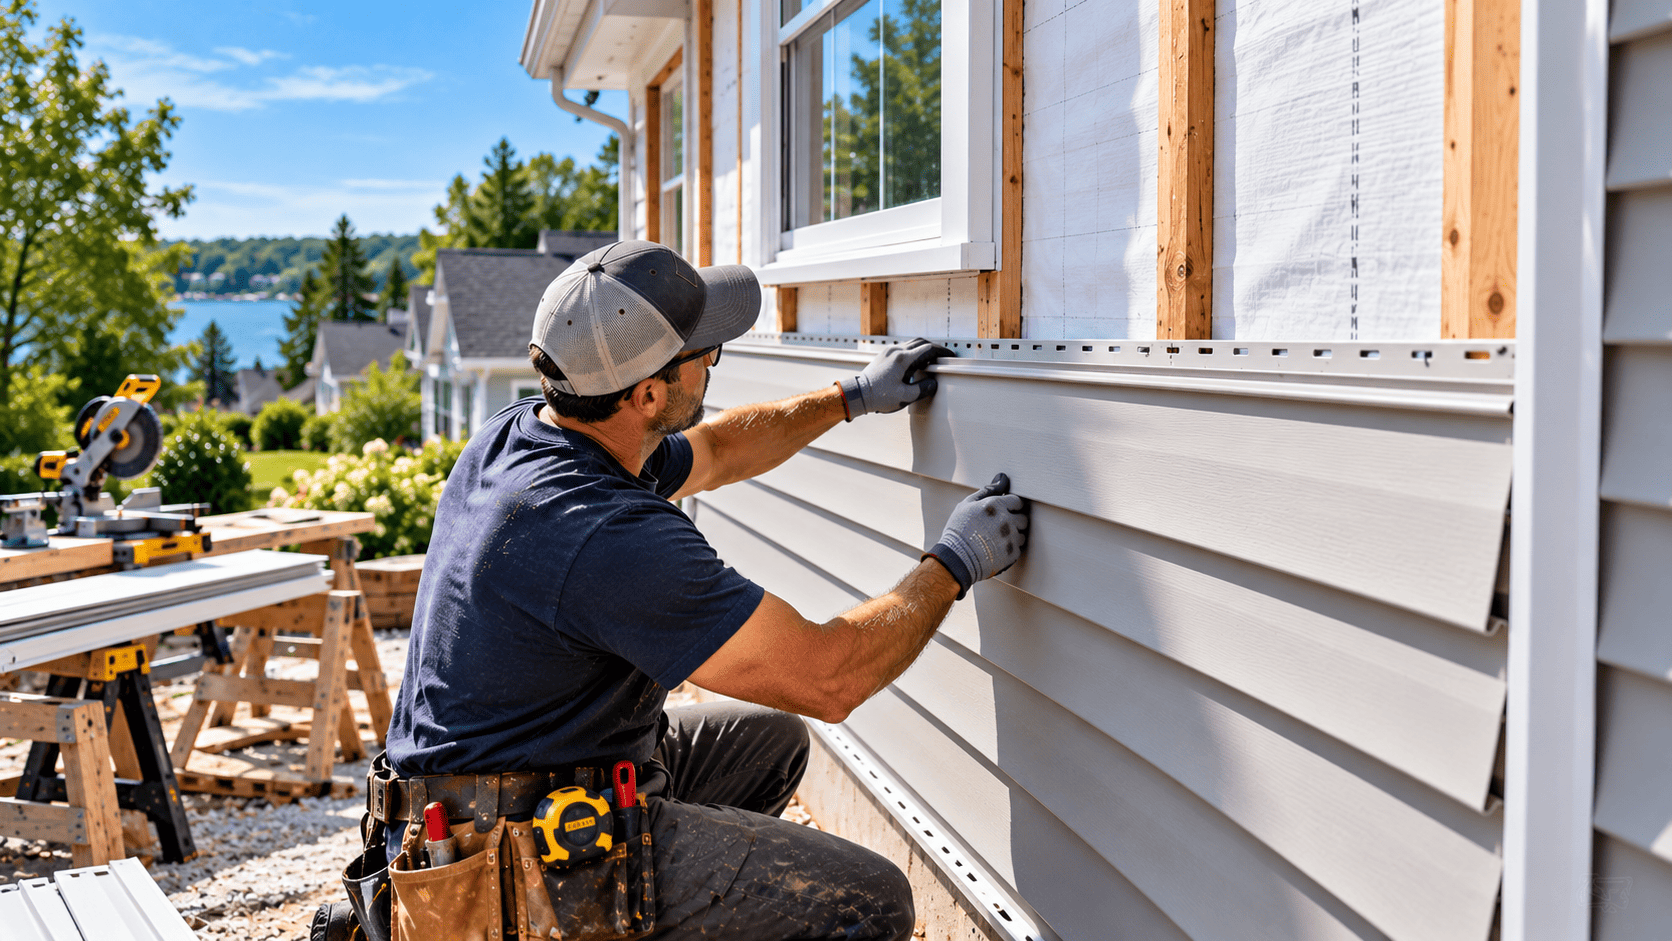
Vinyl siding can provide a durable, attractive, and relatively low-maintenance exterior, but its long-term performance depends heavily on how it is installed. Proper preparation, flashing, fastening, moisture management, and expansion clearances all play an important role in protecting the home.
- How to install vinyl siding correctly involves much more than attaching panels to an exterior wall. Preparation, flashing, fastening, clearances, and moisture management are all essential.
- Vinyl siding expands and contracts as temperatures change, so panels must have enough room to move without buckling.
- A weather-resistant barrier and properly installed flashing help protect the structure behind the siding from moisture.
- Installation typically begins with starter strips and corner posts before progressing upward with overlapping siding panels.
- Windows, doors, rooflines, and other transitions require careful detailing to prevent water intrusion.
- Although homeowners can benefit from understanding the installation process, professional installation can reduce the risk of costly mistakes and premature siding failure.
Understanding How Vinyl Siding Is Installed
Vinyl siding is popular among homeowners because it combines durability, relatively low maintenance requirements, and a wide variety of styles and colors. However, the performance of the finished exterior depends heavily on how well the siding is installed.
Understanding how to install vinyl siding begins with recognizing that siding is part of a larger exterior wall system. The panels provide the visible exterior surface, while components underneath and around them help manage moisture, air movement, and changing weather conditions.
This is especially important for Connecticut homes, where siding must withstand hot summers, freezing winters, rain, snow, wind, and repeated temperature fluctuations.
The following guide explains the major steps involved in a typical vinyl siding installation and why each one matters.
Inspect the Existing Exterior
Installation should begin with a careful evaluation of the wall.
If existing siding is being removed, the exposed exterior should be inspected for:
- Rotted sheathing
- Water damage
- Mold or mildew
- Loose materials
- Deteriorated flashing
- Structural damage
- Uneven wall surfaces
Installing new siding over unresolved deterioration can conceal a problem rather than correct it.
Any damaged materials should be addressed before installation continues.
Homeowners planning a siding project can learn more about Signature Exteriors’ siding installation and replacement services and the factors that should be evaluated before new siding is installed.
Prepare a Flat Installation Surface
Vinyl siding performs best when installed over a flat, stable surface.
Irregularities underneath the siding can affect the appearance of the finished exterior and may prevent panels from sitting properly.
Depending on the home’s construction and existing exterior, preparation can include:
- Removing loose materials
- Repairing damaged sheathing
- Securing existing surfaces
- Correcting protruding fasteners
- Addressing uneven sections
Preparation may not be as visually noticeable as the finished siding, but it has a major effect on installation quality.
Install the Weather-Resistant Barrier
Vinyl siding is designed to shed water, but it is not a completely waterproof barrier.
Some moisture can reach the area behind siding during wind-driven rain and other weather events. For that reason, the wall assembly generally includes a weather-resistant barrier behind the exterior cladding.
The barrier helps direct water away from the structure and protects vulnerable materials underneath.
Proper installation is particularly important around:
- Windows
- Doors
- Exterior penetrations
- Corners
- Roof-to-wall intersections
The U.S. Department of Energy provides additional information about moisture management and its importance in protecting a home’s building envelope.
Address Flashing Before Installing Siding
Flashing helps direct water away from vulnerable exterior transitions.
It is particularly important around windows and doors because these openings interrupt the continuous wall surface.
Before siding installation, contractors should evaluate flashing around:
- Windows
- Exterior doors
- Roof intersections
- Utility penetrations
- Other wall openings
New siding should not be used to cover failed or improperly installed flashing. If water can enter behind the siding, it may eventually damage sheathing, insulation, framing, or interior finishes.
Establish a Level Starting Point
One of the most important early steps is establishing a level reference line.
If the first course of siding is not level, the error can become increasingly noticeable as additional courses are installed.
Installers typically measure carefully around the building and establish a consistent starting point before attaching the starter strip.
This creates the foundation for the siding courses above it.
Install the Starter Strip
The starter strip is installed near the bottom of the wall and provides the connection point for the first siding panel.
It must be:
- Level
- Properly positioned
- Securely fastened
- Correctly spaced from adjoining components
Because every siding course builds from the first one, errors at the starter strip can affect the appearance of the entire wall.
Install Corner Posts and Trim Channels
Before the main siding panels go onto the wall, installers generally position the accessories that receive and finish the panels.
These can include:
- Outside corner posts
- Inside corner posts
- J-channel
- Window trim
- Door trim
- Utility trim
These components create finished edges and provide space for the siding panels to expand and contract.
Corners and openings should be carefully aligned because they remain highly visible after installation.
Install the First Course of Vinyl Siding
Once the starter strip and accessories are in place, installation of the siding panels can begin.
The bottom edge of the first panel locks into the starter strip.
The panel is then fastened through the designated nailing slots.
Vinyl siding should not be nailed tightly against the wall.
The siding needs to move as temperatures change.
Fasteners are generally centered within the nailing slots and left with enough clearance to allow horizontal movement.
If siding is fastened too tightly, thermal expansion can cause panels to buckle or distort.
Continue Installing Panels Up the Wall
After the first course is installed correctly, additional courses are added from the bottom upward.
Each new panel locks into the course below it.
Installers continually check:
- Alignment
- Panel engagement
- Fastener placement
- Clearance
- Seams
- Level
Panel joints are typically staggered so that seams do not create a distracting vertical pattern.
Careful planning also helps place seams in less noticeable areas of the exterior.
Allow for Expansion and Contraction
Vinyl changes dimension as temperatures rise and fall.
This means installers must provide appropriate clearance where panels meet:
- Corner posts
- J-channels
- Window trim
- Door trim
- Other accessories
Without enough room for movement, siding may buckle during warm weather.
Incorrect fastening is one of the most common reasons vinyl siding develops a wavy or distorted appearance after installation.
Work Carefully Around Windows and Doors
Openings require precise measuring and cutting.
Siding panels may need to be notched or trimmed so they fit properly into channels surrounding windows and doors.
The installation must maintain enough room for movement while preserving the drainage and flashing system around the opening.
This is also a useful time to evaluate the windows themselves.
If windows are already deteriorated, inefficient, difficult to operate, or nearing replacement age, homeowners can review Signature Exteriors’ window replacement services when planning a broader exterior renovation.
Coordinating siding and window work can sometimes make it easier to address flashing and exterior trim correctly.
Finish the Top Course
The final course of siding often requires different preparation from the full panels below it.
The panel may need to be cut lengthwise to fit the remaining space beneath the soffit or other upper trim.
Depending on the system, finishing accessories help secure the cut panel while maintaining a clean appearance.
Careful measurement is particularly important here because poorly fitted upper panels can become loose or create visible gaps.
Vinyl Siding Installation at a Glance
| Installation Stage | Primary Purpose |
|---|---|
| Exterior inspection | Identify damage before it is concealed |
| Wall preparation | Create a stable installation surface |
| Weather barrier | Help manage moisture behind siding |
| Flashing | Protect vulnerable openings and transitions |
| Starter strip | Establish the first siding course |
| Corners and trim | Finish edges and receive siding panels |
| Panel installation | Create the finished exterior surface |
| Expansion spacing | Allow siding to move with temperature changes |
| Final inspection | Confirm alignment, fastening, and finishing |
Each stage affects the performance of the completed exterior.
Common Vinyl Siding Installation Mistakes
Knowing how to install vinyl siding also means understanding what can go wrong.
Nailing Siding Too Tightly
This prevents the panels from moving naturally as temperatures change and can cause buckling.
Skipping Wall Repairs
Installing new siding over rot or moisture damage simply conceals an existing problem.
Improper Flashing
Poorly detailed windows, doors, and roof intersections can allow water behind the exterior.
Incorrect Starter Strip Installation
If the starter strip is not level, the courses above it may also appear uneven.
Insufficient Clearance
Panels need adequate space where they terminate inside channels and trim.
Poorly Planned Seams
Improper seam placement can make the finished installation look inconsistent and less professional.
Ignoring Manufacturer Instructions
Installation requirements can vary between products. Contractors should follow the specifications for the particular siding system being installed.
Should You Install Vinyl Siding Yourself?
Homeowners with construction experience may be able to complete limited siding work, but whole-house siding installation requires more than basic fastening skills.
The project involves:
- Working at height
- Accurate measurements
- Specialized cutting
- Moisture management
- Flashing
- Exterior detailing
- Proper fastening
- Understanding expansion requirements
Mistakes may not become obvious immediately.
For example, siding installed too tightly might look correct on installation day but begin buckling after temperatures increase. Improper flashing may remain hidden until water damage develops.
For larger projects, professional installation can reduce these risks.
Considering New Siding for Your Home?
Professional installation helps ensure the wall preparation, flashing, trim, fastening, and siding system work together properly.
What Happens If the Roof and Siding Meet?
Certain parts of a home require particularly careful coordination between roofing and siding.
Roof-to-wall intersections need proper flashing so water traveling down the roof is directed away from the wall assembly.
These areas should be evaluated carefully during siding work.
If the roof is also approaching the end of its service life, homeowners may want to consider project sequencing before installing new siding. Signature Exteriors’ roof replacement services provide additional information for homeowners planning improvements to multiple parts of the exterior.
How Long Does Vinyl Siding Installation Take?
Project duration varies depending on:
- Home size
- Number of stories
- Architectural complexity
- Weather
- Existing siding removal
- Required repairs
- Trim complexity
- Crew size
Unexpected damage discovered after removing existing siding can also extend the schedule.
A professional estimate should explain the anticipated project scope and general installation process before work begins.
Maintaining Vinyl Siding After Installation
One reason homeowners choose vinyl is its relatively low maintenance requirements.
After installation, homeowners should periodically:
- Inspect panels for damage
- Check for loose siding after storms
- Keep gutters functioning properly
- Clean accumulated dirt when necessary
- Keep vegetation away from the exterior
- Watch for staining that could indicate moisture
- Inspect areas around windows and doors
Regular visual inspections can help identify minor problems before they require more extensive repairs.
Frequently Asked Questions
Do you install vinyl siding from the top or bottom?
Vinyl siding is generally installed from the bottom upward. The first course connects to a properly positioned starter strip, and subsequent courses lock into the panels below.
Should vinyl siding be nailed tightly?
No. Vinyl siding needs room to expand and contract as temperatures change. Fastening it too tightly can cause buckling or distortion.
Does vinyl siding need a moisture barrier?
Vinyl siding is not intended to function as the home’s only water-management layer. A properly designed wall assembly generally includes a weather-resistant barrier and appropriate flashing behind the siding.
Can vinyl siding be installed over damaged siding?
Existing deterioration should be evaluated before new siding is installed. Covering rot, water damage, or structural problems can allow those conditions to worsen unseen.
Can you replace windows while installing siding?
Yes. If windows already need replacement, coordinating both projects can allow flashing and trim around the openings to be integrated efficiently.
Is vinyl siding difficult to install?
The basic panel system may appear straightforward, but proper whole-house installation requires knowledge of flashing, moisture management, expansion clearances, fastening, trim, and exterior construction.
Proper Installation Protects the Entire Siding Investment
Learning how to install vinyl siding makes it clear why the details behind the finished exterior matter so much.
A successful project starts with a sound wall surface and proper moisture protection. Starter strips, corner posts, flashing, trim, fasteners, panel spacing, and expansion clearances must then work together as a complete system.
When those details are handled correctly, vinyl siding can provide an attractive, durable, and relatively low-maintenance exterior for many years.
If you are considering new siding for your Connecticut home, Signature Exteriors can evaluate the existing exterior, identify any repairs that should be completed first, and recommend an installation approach designed for long-term performance.
Plan Your Siding Project with Confidence
Get professional guidance on siding installation, exterior preparation, flashing, moisture protection, and the right approach for your home.